Howdy Scrappers!
Are you ready to take a few quiet moments out of the holiday rush for some scrappy inspiration? We have a new issue of GingerScrapsStreet Magazine for you! Step inside the pages and enjoy ideas for your holiday scrapping and so much more!
And after you get that mojo started, head over to Memorie Creations the inspiring blog talented designer Annlies de Zeeuw. Annlies is the force behind MC Designs who gifted all of our readers this fun holiday kit. She has a bold and colorful style with lots of cool creatures in her kits. You will definitely want to see more!
Go ahead and download it today! {download}
Please respect this generous gift and do not upload/share this kit. Friends are welcome to download it here for the next month. Thank you!
Are you feeling ready to scrap? Check out our current calls! We definitely want to see what you are creating. Happy Holidays!
Wednesday, November 30, 2011
Acrylic Albums - Some Ideas
Have you ever made an acrylic album? If not, have you wanted to? Well, I thought I would show you some past
acrylic albums that I have made. It’s
kind of tough to get a good photo of an acrylic album because after all they
are see-through. But here are some
photos of albums I have made and the many techniques you can use on acrylic.
Thought I would start off with a little Holiday spirit! The cover is a snowflake pattern while the
rest of the album is chipboard. I wanted
the cover to be festive but also to “feel” like winter; so I added a snowman
and some more snowflakes to the album.
In order to enhance the winter feel I added sparkly glitter to the
acrylic cover. I think that by adding
the glitter to the cover it makes the whole album look frosty.
Here is another album with an acrylic cover. On this album I wanted to soften the edges of
the “present” to bring the eye to the title.
So I added white paint and sponged it on.
One thing you have to be careful of when using acrylic is to
remember it is see through. So whatever
you have on the front – you will be able to see from the back. In this case If I had not put a strip of
cardstock with poinsettia’s on the back of the front page – you would have seen
the back of the “jolly” title from the front, and that would not be pretty.
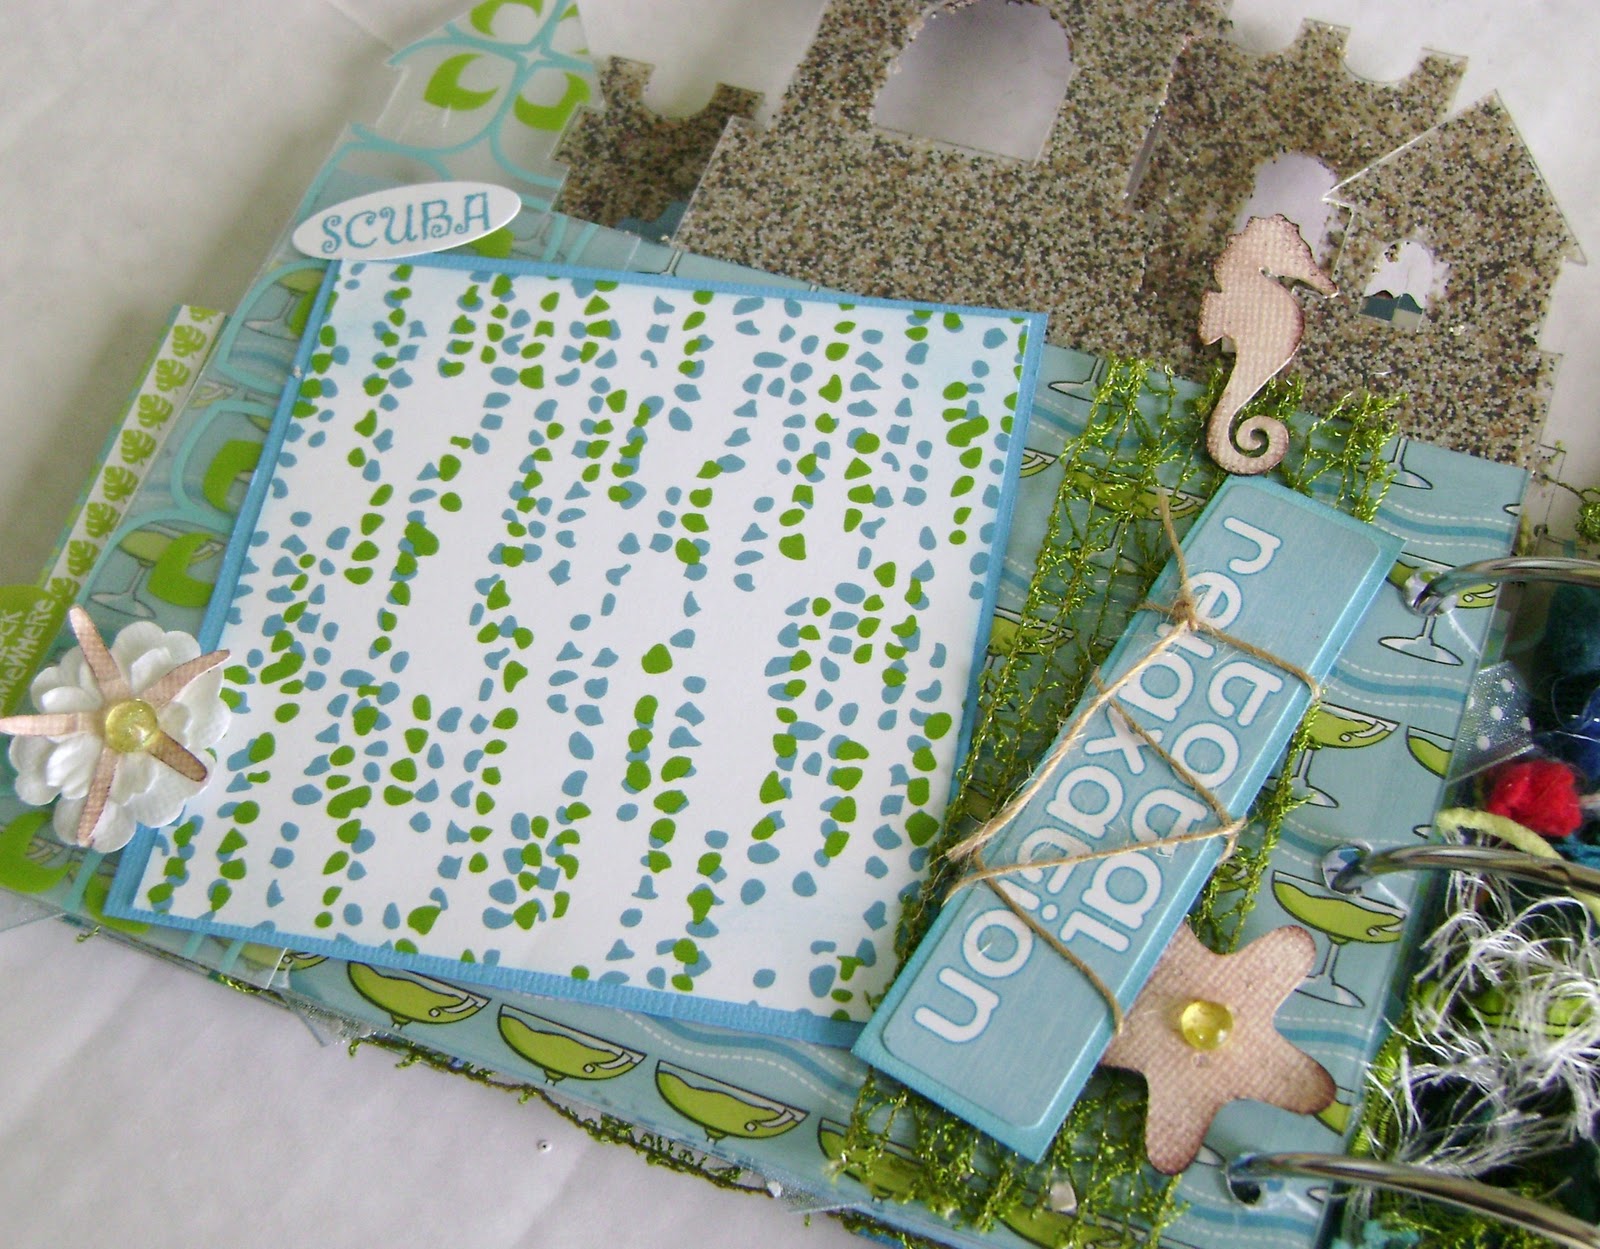
Now in my beach album example the whole album was acrylic so
I had to be careful with each page. I
wanted cohesiveness throughout the album and keep up with the beach theme. In this example I used sand that came in a bottle
and mixed in with glue. The sand was great to use because all you see is sand
on the back of the acrylic page showing through. In this sample I also used transparencies to
cover some of the pages.
In my last example I wanted to emphasize to think outside
the box. No one said there were rules
about what you can put on your album. In
this case I used a wood miniature window frame and a metal door handle. I also stamped with stazon and used rub-ons.
The albums that I used above are from Clearscraps and MyLittle Yellow Bicycle. There are lots of
choices as to the shape of your album - so get started and start playing with acrylic. If you want to ease into it, just start off
with an acrylic cover.
Happy Scrappin.
Labels:
albums,
clearscraps,
mylyb,
veronica johnson
Tuesday, November 29, 2011
Happy Birthday Dad!
Today is my dad's birthday so I just want to say: HAPPY BIRTHDAY DAD!
I always like to browse the galleries to gain ideas for masculine birthday cards. What I'm finding more and more, however, is the brilliant use of bright and unexpected colors on this "man" cards. I kind of like that. I mean, who invented the whole concept that the cutesy bright colors have to be female and the bold and neutral colors had to be male. I say, let's not conform to this nonsense and break the "rules"!
Are you with me???
As I browsed the gallery at Two Peas in a Bucket the other day I found two cards that stood out to me. Both are meant for dad and I love them.
I always like to browse the galleries to gain ideas for masculine birthday cards. What I'm finding more and more, however, is the brilliant use of bright and unexpected colors on this "man" cards. I kind of like that. I mean, who invented the whole concept that the cutesy bright colors have to be female and the bold and neutral colors had to be male. I say, let's not conform to this nonsense and break the "rules"!
Are you with me???
As I browsed the gallery at Two Peas in a Bucket the other day I found two cards that stood out to me. Both are meant for dad and I love them.
:Click here to see the card in the gallery:
(Psst... she even added a butterfly! Elizabeth is truly a rule breaker.)
By Kimberly Neddo
:Click here to see the card in the gallery:
ADORABLE aren't they? Yet I love the brilliance of design that both women used. Elizabeth backed her bright colors with a strong neutral color and Kimberly's card has bold, lines that exude a manliness.
I dare you to go beyond the safety zone of blue, browns and earthy tones for those men. Add a butterfly, some reds and, heck, even some BLING! You can do it. :)
hugs,
Monday, November 28, 2011
Glitz+Epiphany Crafts=Awesome!
I really love using Epiphany Craft's round tools. For this layout, I used the Round Tool 14 and their adorable metal charms! If you don't own any of their products, you're missing out! When I'm low on embellishments or I'm missing something... I will grab my tools and embellies by Epiphany Crafts to help add that certain "wow" to my projects!

Tip: Use foam squares to hold your charm in place and insert a pin through the loop into a flower to make it look like the pin is holding the charm into place.

Epiphany Crafts Supplies:
Epiphany Crafts Shape Studio Tool Round 14
Epiphany Crafts Metal Charms
Other:
Glitz Design Vintage Blue, Beautiful Dreamer and Dancin in sunshine Papers.
Glitz Design Vintage Blue- Glitzers
Glitz Design Vintage Blue- Giant Rhinestones
Glitz Design Vintage Blue- Epoxy Word Stickers
Glitz Design Vintage Blue- Trims
Glitz Design Dancin in sunshine- Cardstock Stickers
Cardstock: Corner rounder: Pen:Creative Memories
Flower: Pin: Maya Road

Tip: Use foam squares to hold your charm in place and insert a pin through the loop into a flower to make it look like the pin is holding the charm into place.

Epiphany Crafts Supplies:
Epiphany Crafts Shape Studio Tool Round 14
Epiphany Crafts Metal Charms
Other:
Glitz Design Vintage Blue, Beautiful Dreamer and Dancin in sunshine Papers.
Glitz Design Vintage Blue- Glitzers
Glitz Design Vintage Blue- Giant Rhinestones
Glitz Design Vintage Blue- Epoxy Word Stickers
Glitz Design Vintage Blue- Trims
Glitz Design Dancin in sunshine- Cardstock Stickers
Cardstock: Corner rounder: Pen:Creative Memories
Flower: Pin: Maya Road

Labels:
Epiphany Crafts,
GLITZ DESIGN
Sunday, November 27, 2011
Holiday Time, Already!
It seems to me that time flies faster and faster with each passing year, and here it is, holiday season already! Every year I vow I won't go all out in decorating our home for Christmas. But it is just too difficult to figure out what to put out as I pull out box after box from our storage room! So, like usual, our home is brimming from top to bottom with lots of seasonal decorations!
A few years ago I decided to start taking photos of the different items throughout the house. I then create a digital scrapbook page with some of the photos. It is always fun to look back at the layouts to see just what sort of creative juices I had in past years while decorating for the holidays!
I hope these layouts have been an inspiration to you!! Wishing you and your family happy holiday decorating!!
Saturday, November 26, 2011
Playing with screens
This month, I had a blast playing with screens. They look so pretty in the background! For my first layout, I used a tree screen and mists (Dark Denim, Sun Sisters) and chalkboard mist (Cherry Cola) for my background. I think these colors together on the kraft cardstock looks amazing!

Need a fun button for your project? Simply spray some mist on cardstock, and use the Button Studio Round 20 Tool to create a funky button like I did. I love Epiphany Crafts' buttons!

For my next project, I decided to use my screen like a stamp. I soaked the Slate mist on the screen and then flipped it onto the cardstock. I think it adds to the vintage feel of this layout! I just love this one. As you can see, misting doesn't need to be complicated! It can be as simple as just spraying your screens and stamping them onto your projects. You don't need very much mist to make your layouts shine!

Here is an old layout of mine that I just love...I love using mist and screens to create my own unique background! I used glimmer mist (Slate, Burnt Red and Sunsisters).

And for my last layout, I used the Iron Works, Glimmer Screen and Chalkboard mist (Teal High Heel) and Glimmer mist (Tuscan Sun).

I hope you've enjoyed your visit and please come back!
-Nicole

Need a fun button for your project? Simply spray some mist on cardstock, and use the Button Studio Round 20 Tool to create a funky button like I did. I love Epiphany Crafts' buttons!

For my next project, I decided to use my screen like a stamp. I soaked the Slate mist on the screen and then flipped it onto the cardstock. I think it adds to the vintage feel of this layout! I just love this one. As you can see, misting doesn't need to be complicated! It can be as simple as just spraying your screens and stamping them onto your projects. You don't need very much mist to make your layouts shine!

Here is an old layout of mine that I just love...I love using mist and screens to create my own unique background! I used glimmer mist (Slate, Burnt Red and Sunsisters).

And for my last layout, I used the Iron Works, Glimmer Screen and Chalkboard mist (Teal High Heel) and Glimmer mist (Tuscan Sun).

I hope you've enjoyed your visit and please come back!
-Nicole
Labels:
Tattered Angels
Wednesday, November 23, 2011
Stamped gift set
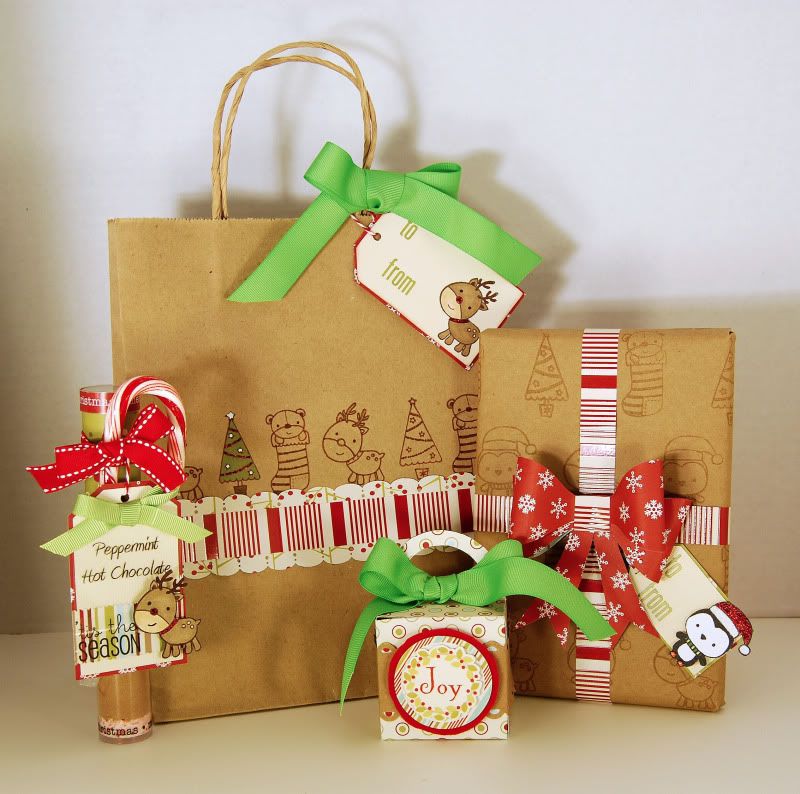
Last year I created this tutorial about a bunch of different ways to use stamps to make your Christmas cards special, while still affordable. Embossing, glossy accents, crackle accents, flock, glitter and stickles can be combined with stamps to add that extra special touch. In the tutorial I used the stamps on cards and can I just say - wow my card making has come a long way in a year! The techniques are still useful though and here I used them on tags, a gift box, wrapping paper and gift wrap.
The gift box is from a printable template from Wendy Bird Designs at A Cherry On Top. These templates are awesome because they are so easy to use. You don't need any special software, just print them on the back side of the paper that you want to use, cut them out and fold on the fold lines. You can also add digital papers and print them out hybrid. Here I printed on the back of the Imaginisce Jingle All the Way paper, then added some punched kraft paper, a layered sticker accent and some ribbon.
For the gift bag, I stamped a row of images with versamark ink. Then it wasnt dark enough for me, so I traced them with a fine brown pen. I colored in the one tree, just for interest, before adding the strip of papers and tying the top closed with a bow. The tag on this one has a reindeer with stickles on his nose and collar.

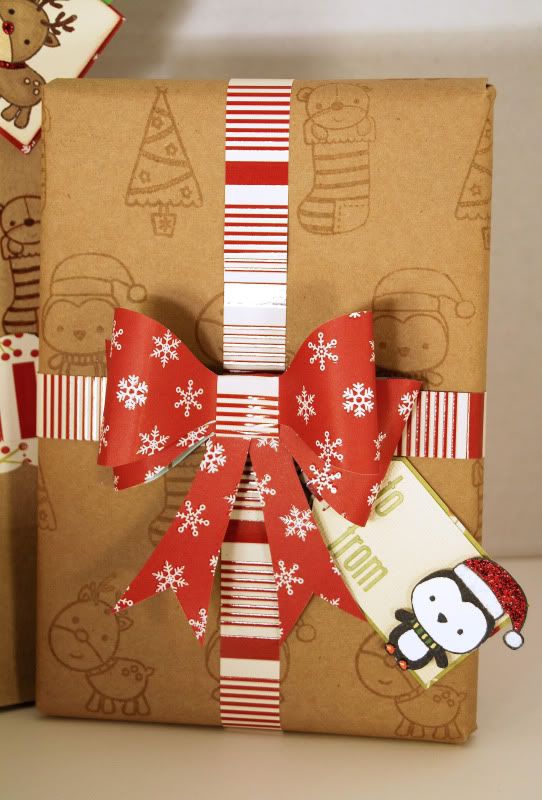
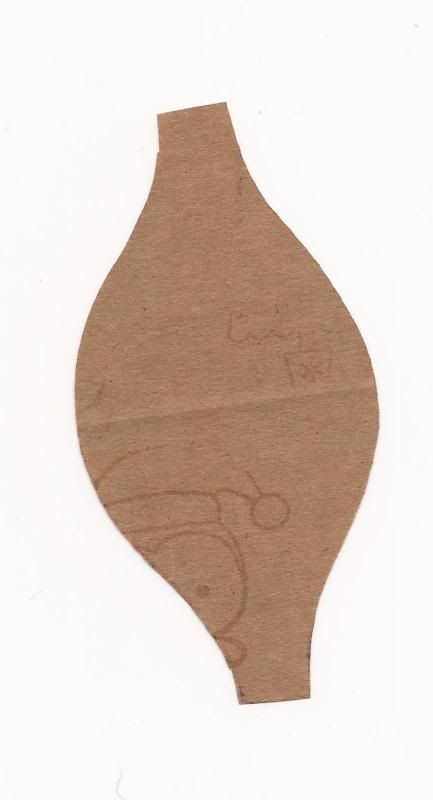
For the wrapping paper, I spread out the kraft wrapping paper and stamped the adorable little critters using versamark ink for a subtle effect. To make it easier, I arranged the 4 stamps on a large block, so I stamped all four at a time, and needed to repeat the pattern less often. Next I added some paper strips and a paper bow - who needs ribbon?! For the bow, I made a template for the loops, which you can see below. Then I copied it four times, and used glue dots to hold each loop together, and the two on each side to each other. Finally I used a strip of a contrasting paper to wrap around and hold all the loops together. The tails of the bow were just freehanded on some scrap paper. I used foam tape to adhere the bow to the package so that the bow didn't get too squished.
The penguin was stamped on white cardstock, then colored in. I then added stickles, glitter flock and glossy accents before fussy cutting it. I used more foam tape to adhere it to the tag. All the tags were cut with my Cricut. The letters are Lily Bee.
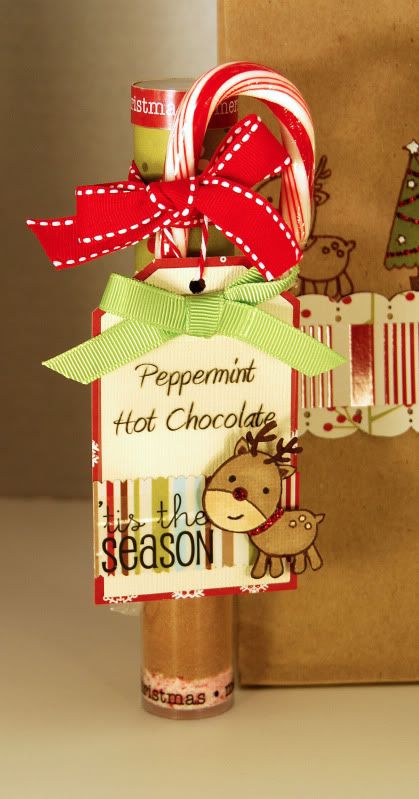
Last but not least, the tube is from SRM stickers. I filled it with layers of hot chocolate mix and crushed peppermint candies. I added some paper strips to the top, and stickers to the bottom and top. Then I added a candy cane and a ribbon, before tying on a tag. The tag features another SRM sticker, and a fussy cut Imaginisce stamped reindeer with a stickled nose and collar. Instructions are on the back of the tag.
Finally, here is the petal template for the bow. Yes, you can see the corner of a penguin stamp, this was a scrap that I had tested the stamp on, but all you really need is the outline.

Subscribe to:
Posts (Atom)