Monday, March 12, 2012

Recycle those product containers~


Hi everyone!!! I love to recycle and I love to make little gifts out of packaging that I would normally throw away.  It saves me money and it is handmade!!! I used this from the tape packages and made some Valentine treats and birthday treats


The paper is by Paper Studio and I turned to Prima, Jenni Bowlin and Epiphany Crafts for embellishments. Helmar 450 Quick Dry was the glue I used.


The quick way to do this is cover the insert with pattern paper, fill with treats and you are ready to decorate the front. Add some ribbon and a tag and you have just made a handmade gift!!!


This set is made out of Vintage Street Market products.  They are so cute and kids love them!!!
Hope you will try this ~ let me know what you come up with!!! See ya soon!
by: C. Mercer

Saturday, March 10, 2012

I Love Fonts

I have to admit it – I love fonts!!  So without further ado, here are some links featuring free favorite fonts … ENJOY!! (clicking on the font name will take you to the site where the font is available)


Friday, March 9, 2012

Using cricut cuts for stamp masking tutorial

I have been experimenting with different stamp techniques lately. I used to be afraid of stamps, then I started challenging myself and found that there are so many things you can do with them. It is actually fun to experiment and try new things.

I'm sure that I'm not the first person to come up with this technique but I hadn't seen it anywhere so I thought I would share it. I used my cricut to cut a shape out from scrap paper. Then I used the negative of that shape as a mask for my stamps. Here I used sentiment stamps but you could use any stamp you like.

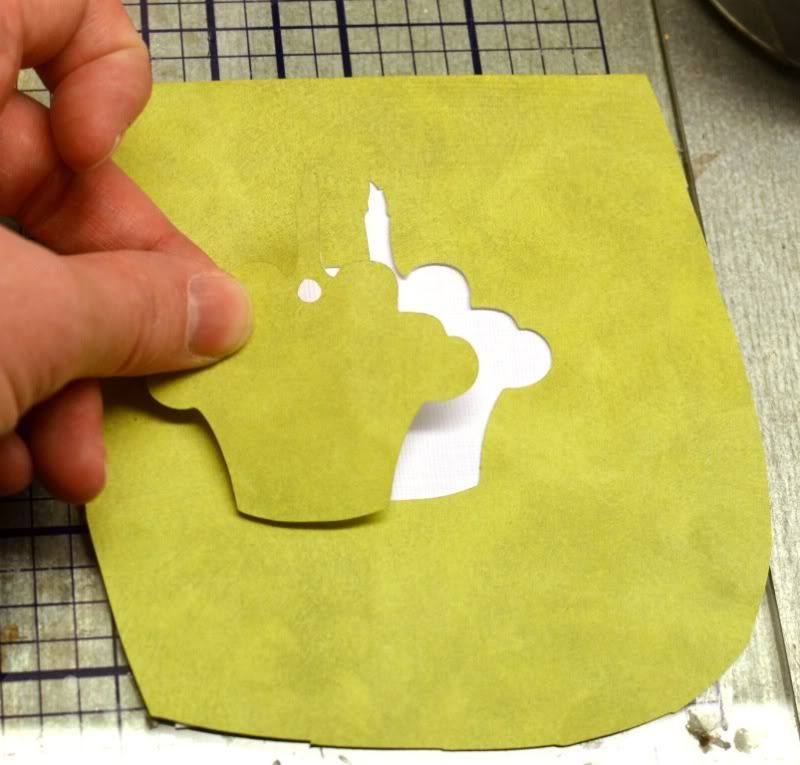
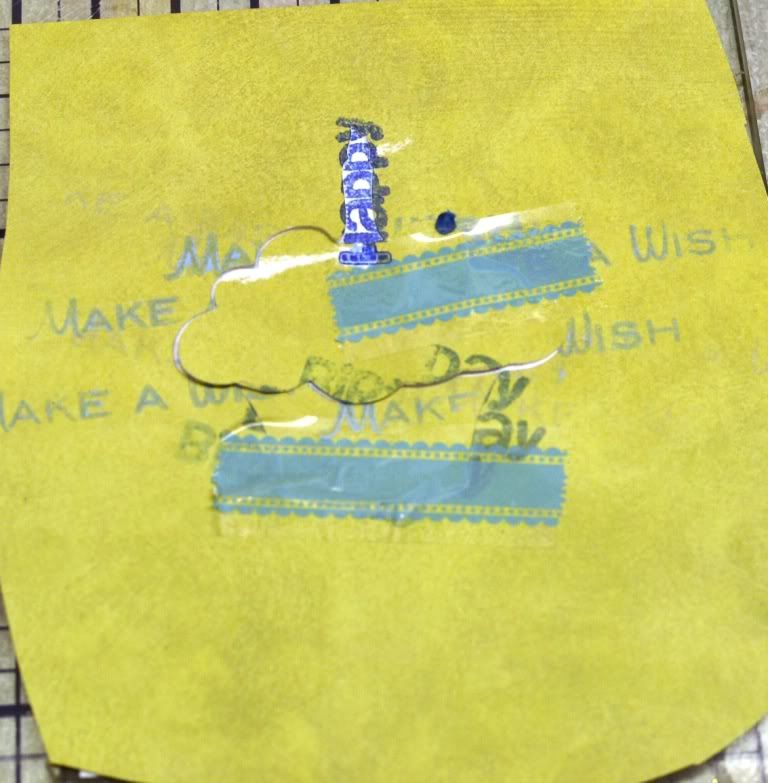
Here is the cut, the way that the cricut made it. I used the tag option from the Damask Decor cartridge. Because I had trouble getting the detail cuts to come out at the same size, I ended up just cutting this cupcake apart to create the sections of my mask. If you have an image with separate pieces though, it would be easier to cut the different pieces and the background and then use the layers as the parts of your mask.

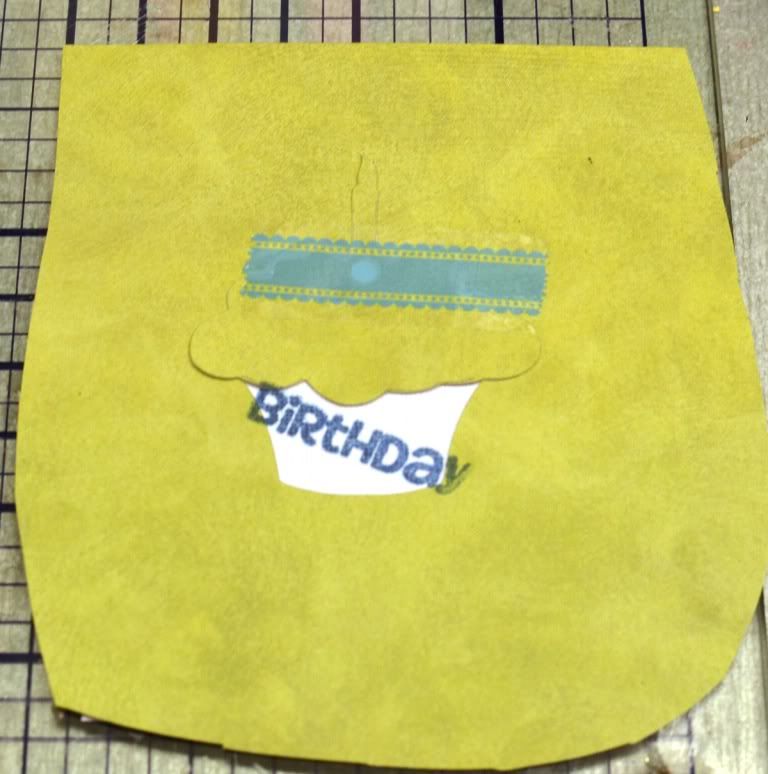
So I cut the bottom off of the cupcake so that I could stamp the bottom part in a darker ink using the 'birthday' stamp. I started with the word birthday on an angle to preserve as much of it as possible. It isn't really necessary that you be able to read the 'birthday' part, but I thought it would be a fun bonus.
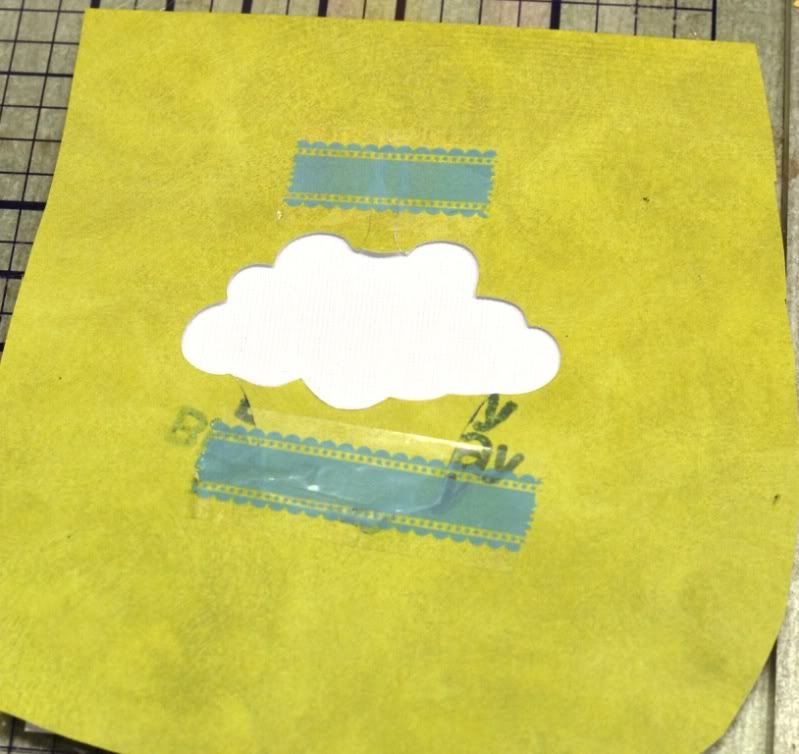
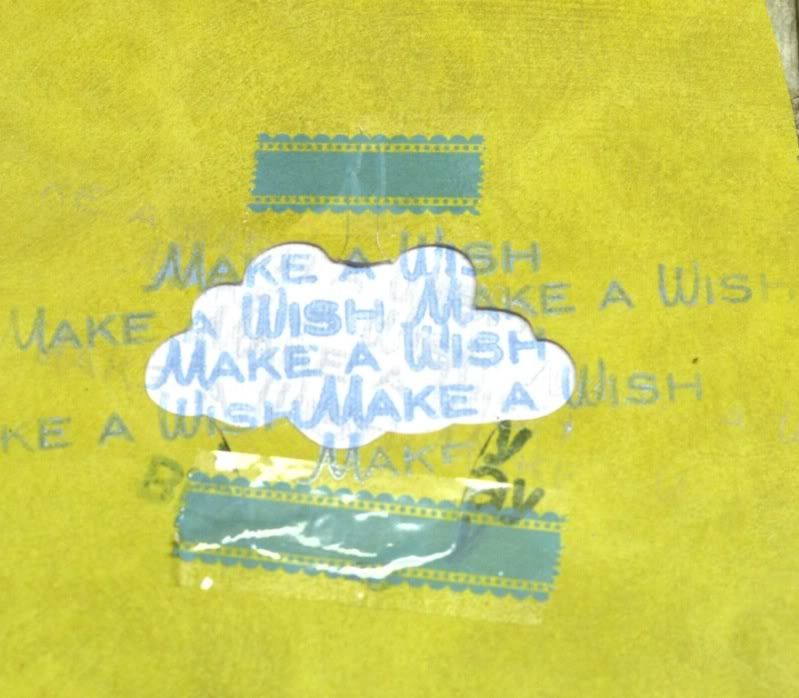
After filling in the rest of the bottom part with more 'birthday stamps, I cut the candle off the top part, replaced the bottom and stamped the icing in two different colors of 'make a wish'.

Finally I masked off the candle and stamped that with 'happy' in a darker blue ink. You can't really read the happy, but that's ok.
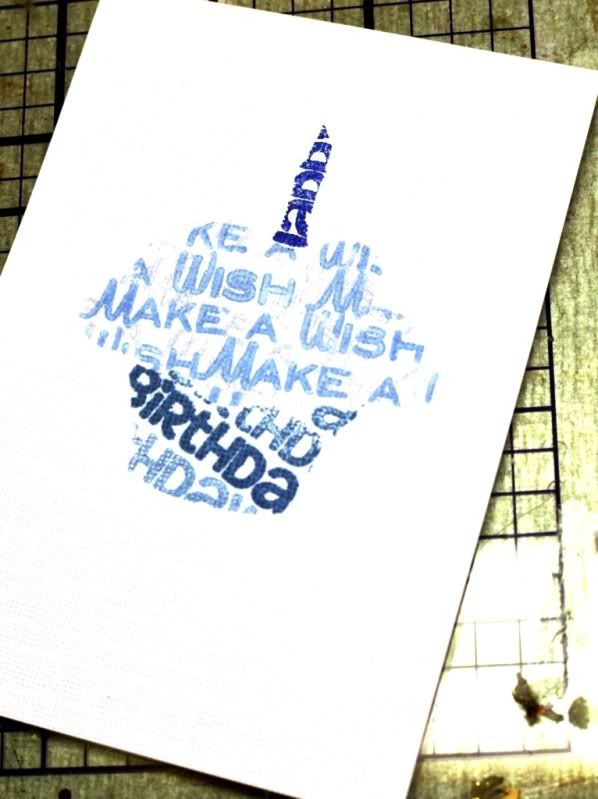
After removing all the masking, this is what it looks like. I should probably mention that the white paper, AND the green mask were both adhered to my glass mat with removeable adhesive so they didn't move at all while I was stamping.
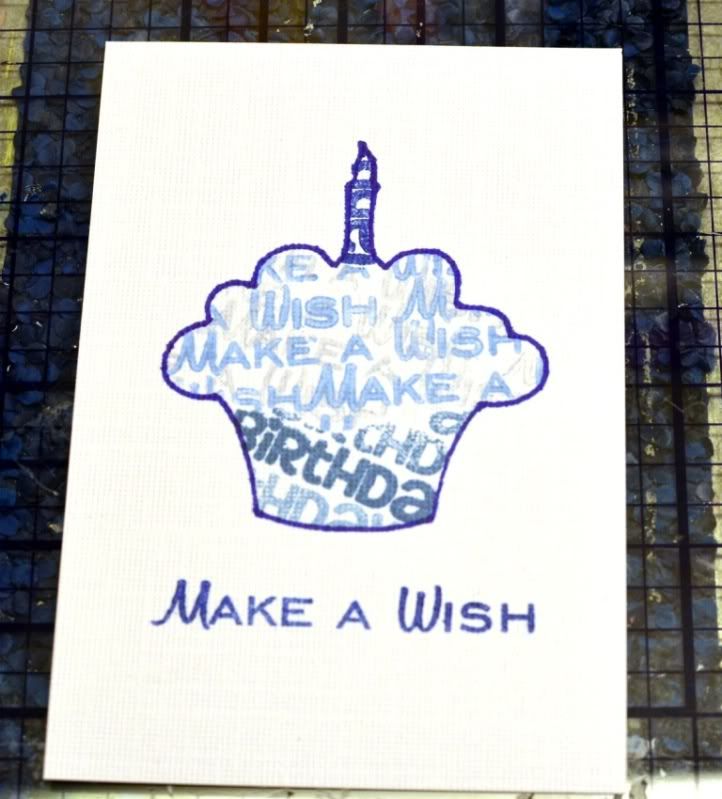
Finally I used the mask once more to trace the outline in blue pen. 


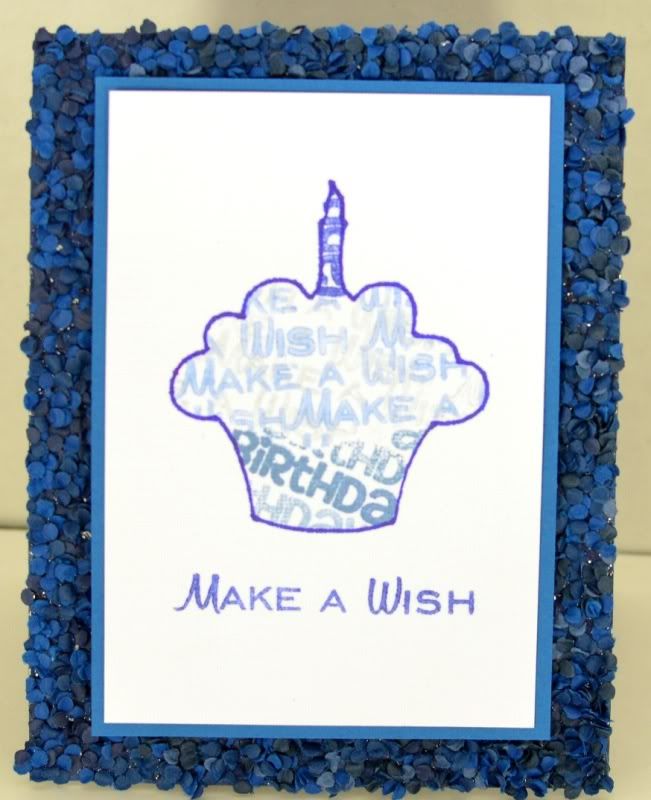
And this is what the finished card looks like

The stamps are from Joy's Life stamps.
I used 'Birthday' from the Everyday Occasions stamps, 'Happy' from the Holiday Occasions stamps and 'Make a Wish' from the 'You're So Punny' stamps.

Supply List: 
Stamps: Joy's Life Holiday Occasions and Everyday Occasions
Ink: Clearsnap Cat Eye Pigment and Chalk inks
Cardstock: Bazzill and American Crafts
Tools: Cricut and Crop-a-Dile big bite
Cricut Cartridge: Damask Decor
Pen: Staedtler

Thursday, March 8, 2012


March is National craft month! And to celebrate that,  the Official Fiskar's Facebook page has tons of challenges going on. And they even have a National Craft Month Sweepstakes that you can enter to win some fabulous fabulous goodies!

My challenge was to create something using just these items: 5 sheets of card stock, photos, Orange handled Scissors, ribbon and adhesive. Just and only these items, nothing else.
Sounds fun eh? Come on! Try something new, try not using patterned paper or stickers and make something that is out of your comfort zone! Me, I made this mini album,

The mini album was a gift for my mom, who spent summer here with us last year. The album was easy to make and  turned out pretty cute.  I already mailed it out to her, and she loves it!! A grandma will always loves photos of her grandkids :)

For more photos with step by step instructions, check out my tutorial on the Fiskars website HERE.

Hope you try something new today while crafting!

Tuesday, March 6, 2012

Let's Talk Trends: Subway Art

I love to keep up with the latest paper crafting trends. I've noticed a lot of trends in the fashion and home decor world also make their way to the crafting world. Case in point; subway art. I'm not talking about graffiti. I'm talking about the signs you see in the home decor section with inspirational phrases using different typography. They are fun.

Many people are making them on the computer. If you still like the old school way of crafting and you really like the feel of ink on your fingers, you can get on board with this trend using stamps, too. Below is a subway art card I made using a new release by Pink by Design. The set is appropriately named Subway Art. Each phrase is a separate stamp, which means  you can easily ink them in different colors, as well as mix and match the sentiments to your liking.

I wanted to grunge it up a bit to give the feel of the vintage subway signs that grazed the NYC transit system, so I distressed the edges, Of course, I had to add some bling to dress it up.

You can create subway art, too, using the stamps you already have in your stash. Just mask off the area you want to stamp. Use grid lines to ensure they are lined up evenly. If you have a stamp positioner, take advantage of it to ensure your image is stamped exactly where you want it.


Friday, March 2, 2012

SFTIO March Kit is live!

Hello everyone! It's time to reveal the March Kit for Scrapbooking From the Inside Out! I love the blues and greens in this kit and my favorite part of this kit are the fabric embellishments and the wooden embellishment! This kit has so many possibilities and there are lots of tiny embellishments so you can easily make your very own embellies if you put your thinking caps on. This month is all about Grace! Whether you tend to be graceful or not, scrap them and get them down on paper! Stop by the gallery today and let the designers inspire you! I promise that your visit will be worth it :)

How about a peek? Head over to SFTIO Site to see the full reveal!


And here is my favorite layout from this month's kit! I just love the possiblities this kit has to offer :)


Wednesday, February 29, 2012

Leap, March, Scrap!

It is time to leap into March!  Did you spend some time doing special things on this bonus day?  My family welcomed a new baby boy into the world.  He is absolutely precious (of course!) and we can now begin the debate--which month do we celebrate his birth?  A good friend of mine happily turned 10 today (or 40 if you count traditionally) and she fully believes that she should always celebrate on BOTH Feb. 28 and March 1.

I am up for celebrating every day!  I know all of my scrappy buddies out there are, too.  After all, we try to find something scrapworthy about each and every day.  Today we have something super special to share--a gorgeous kit from talented Pixels by Jen.  Her designs are always lively and totally fun!  Take a peek at her blog to keep up with her latest releases, specials, and tons of inspiration.

Here is the freebie she created just for our readers:  Bring me a rainbow.


Download Links:  {expired}
Please respect this generous gift and do not upload/share this kit.  Friends are welcome to download it here for the next month.  Thank you!

Ready for some more inspiration?  We have another quick and easy read--our March mini mag.


Next month we will be back with a full ScrapStreet Magazine issue.  We will look for you then!