The Holidays are just around the corner, so why not get an
early start? You can begin by making
some embellishments for Halloween since there are only a couple of days left in
September. I started rummaging through
my box of Halloween embellishments (I organize by theme) and saw these two
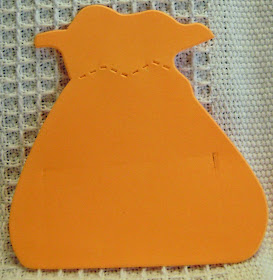
“VERY OLD” die cuts. I don’t even
remember where I got them, that’s how old they are. But, I love a challenge, so I went from this:
What to do? I could
have inked it and added some ribbon, but still it would have looked pretty
plain. So I decided to revamp the old
shaker box idea, remember that? Shaker
boxes were more popular several years ago, so why not kill two birds with one
candy sack?
I cut out a square in the middle of the die cut, and then I
added a square piece of plastic I got from an embellishment package. Next I added some beads to put into the
square to make the beads look like candy.
It was that easy to make a shaker
box!
I also “prepare” my embellishments by layering them to a piece
of cardstock or pattern paper. By doing
this I create a sort of “border” so that I can glue down the ready-made
embellishment to a layout or album.
Voila! I am ready for at least a two page layout, and I feel good about
the fact that I used some of my old stash!


I love these so much that I had to comment on your blog AND here. I have lots of old things that I want to "spruce up" now! thanks
ReplyDeleteWhat a great idea! You really made these diecuts shine!!!
ReplyDeleteWhat a great idea. Love your new creations too, you got me thinking now!
ReplyDeletesuper idea! thanks!
ReplyDelete